Authors: Joel Goh, Maximiliano Palay, Rahul Roy, Sophia Schiffer, Jialu Yu
Introduction
In this project, the Franka arm searches for known randomly placed pins and shoots them down. The Franka arm is fitted with an onboard camera to search its environment and two Nerf blasters to be able to shoot the targets. There are two rounds of shooting, while during each rounds, the user can verbally specify colors of the pins that the arm is going to shoot and the Franka arm will pick up one gun to shoot all the designate colored pins at the environment.
Overall System
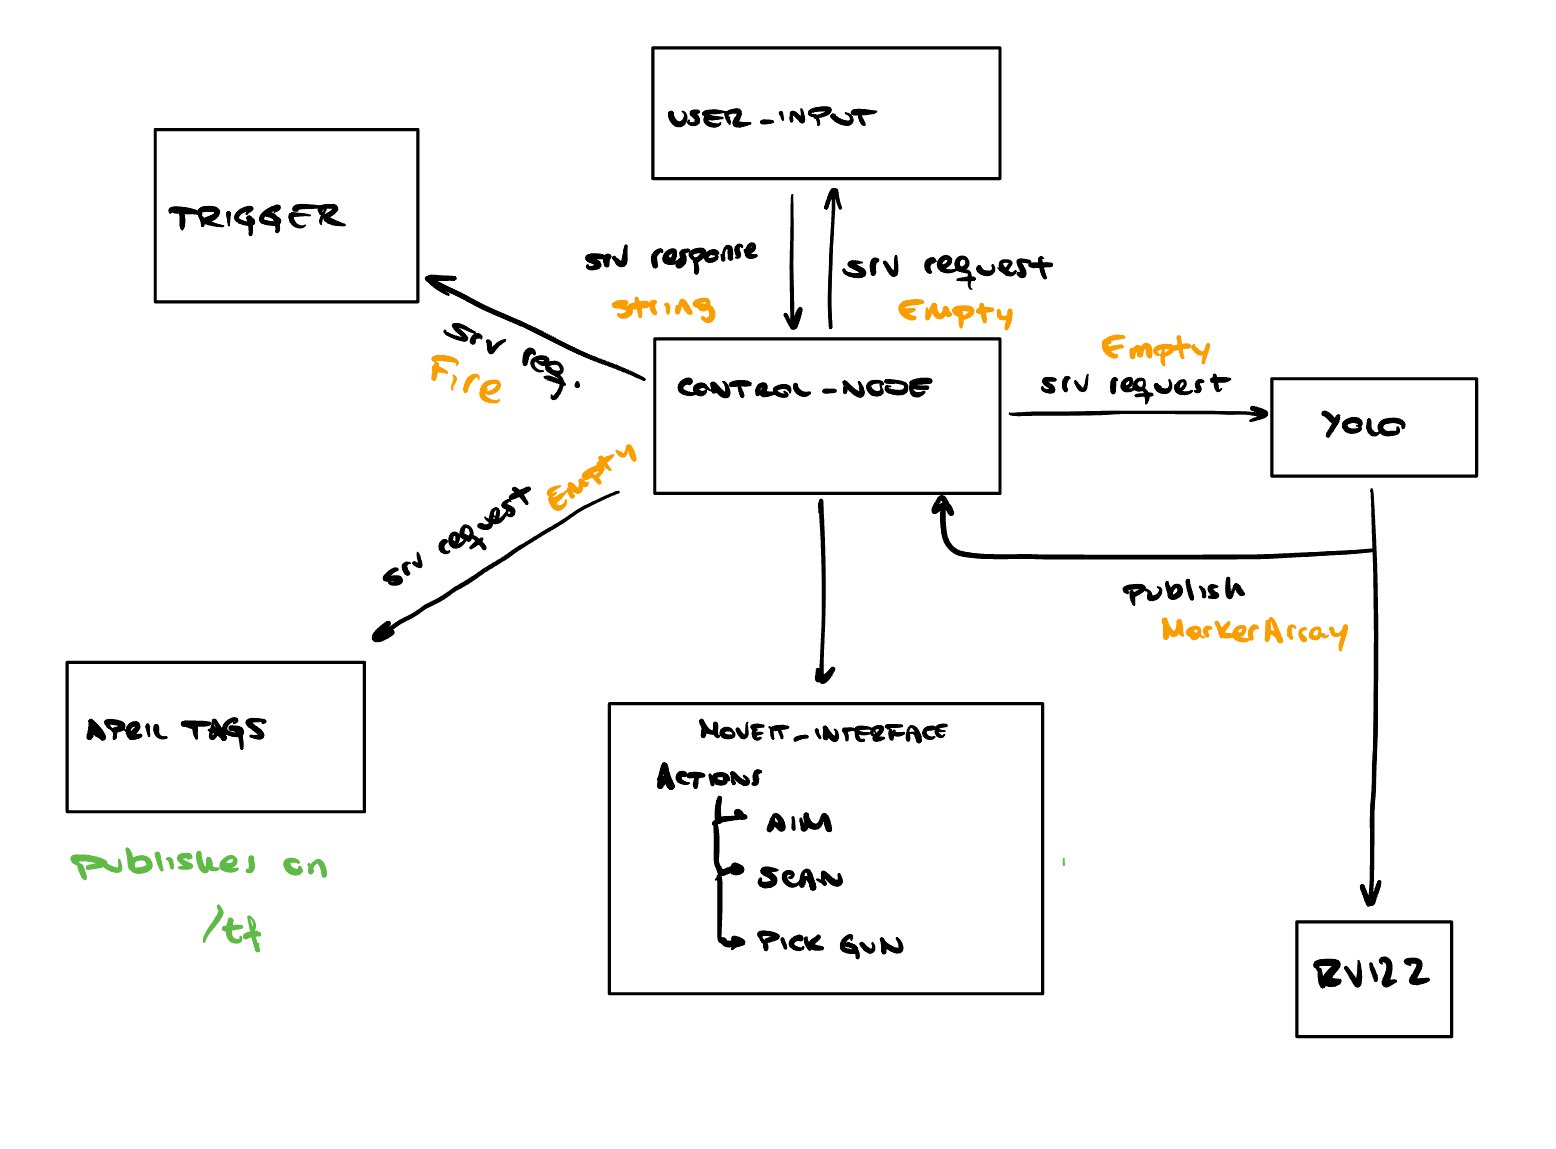
The image below shows the different nodes in the system and how they communicate with each other. Each node’s funtionalities will be explained below.

Nodes
Crafted by our team within the ROS(Robot Operating System), this project features several key components:
- Control Node
- Acts as the main hub, coordinating tasks by calling services from other nodes to complete the demo.
- MoveGun Node
- Manages path planning and robot movement, handling everything from body to gripper. It uses MoveIt-interface services like Cartesian planning, IK planning, and gripper requests.
- Yolo Node
- Runs YOLO (Real-Time Object Detection System) to find colored bowling pins in relation to the base of the Franka arm. Displays their positions as markers in Rviz2, a user-friendly graphical interface.
- User_Input Node
- Listens to the user’s audio input and commands the robot about the color of the targeted pins, making the system responsive to user instructions.
- Trigger
- Controls the Arduino to automate the gun’s trigger, adding automation and precision to the project.
- Apriltag_node
- Created by the University of Michigan Team.
- This node scans and provides coordinates for April tags. We use it to help the robot grip the gun by accurately detecting its position. The AprilTag technology ensures precise and reliable positioning in our project.
Launch Files
- Shoot_pins.launch.xml in control package
- This launch file starts up the six nodes listed above and RViz node to help visualize the target pins and robot movement simulation.
Quickstart to reproduce the project
- Connect the Arduino and RealSense camera to the computer
- Optional to connect an external microphone to your computer but the built-in computer microphone works as well
- Ensure that the two nerf guns are in front of the Franka arm roughly symmetrical around the y axis
- The two guns need the apriltag 42 and 95 from the 36h11 family
- Each gun is also loaded with 6 bullets
- Start the moveit group on the Franka station using
ros2 launch franka_moveit_config moveit.launch.py use_rviz:=false robot_ip:=panda0.robot - Connect to the realsense by running on your computer
ros2 launch realsense2_camera rs_launch.py depth_module.profile:=1280x720x30 pointcloud.enable:=true align_depth.enable:=true - On your computer run the launch file,
ros2 launch control shoot_pins.launch.xml, which starts the rest of the necessary nodes- An error message will show with the msg, “Waiting for input”, where the audio input can be given starting the demo